Github Enterprise on Proxmox
Intro
- Github Enterprise Server contains all the features developers love about Actions and Packages. Workflows can be triggered by events such as creating an issue, a new release, or opening a pull request – making it easy to automate and customize your GitHub deployment.
- Proxmox Virtual Environment is an open-source server virtualization management platform. It is a Debian-based Linux distribution with a modified Ubuntu LTS kernel and allows deployment and management of virtual machines and containers.
Create a VM
Firstly, we need to create a basic VM. Though since we’re going to be using the Github Enterprise Server QCOW2 image we won’t need to specify any boot media. Thus the options should look something like this.

In the Hard Disk section we will be asked to configure a Disk size but that doesn’t really matter since we will be discarding it later on.
Removing the current disk
This step comes in 2 parts:
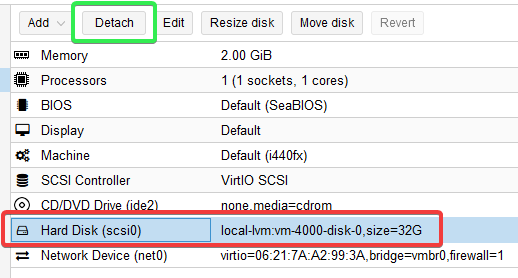
- Detaching the default disk
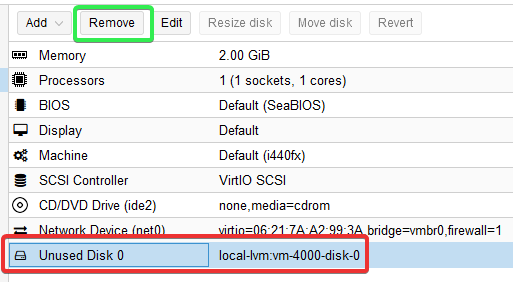
- Deleting the detached disk
Note
The Hardware settings shown in the above pictures were created at the base value that Proxmox imports and are not suitable for a working Github Enterprise Server installation.
Downloading the Github Enterprise Server disk image
Secondly, we need to download the Github Enterprise server image. Since we’re going to be deploying it on Proxmox we specifically need the QCOW2 format. The image can be downloaded on the release page. Since we will be importing this as a disk for a VM later we want to save it on the root machine.
We can download the latest (as I’m writing this) image as follows:
wget https://github-enterprise.s3.amazonaws.com/kvm/releases/github-enterprise-3.0.6.qcow2 -O ghes.qcow2
Importing the disk image
Replace VM_ID with the ID of the previously created VM and STORAGE_NAME with the Storage on which you want the disk to be saved.
qm importdisk $VM_ID ghes.qcow2 $STORAGE_NAME
Once the import has finished we need to attach the disk in the Hardware tab of the VM.
 Once we’re in the menu we just need to press
 Add. Though you can also edit any of the other disk settings if need be.
Creating the 2nd disk
Now since we need some storage other than what the image allocates we will create another disk.
The minimum requirements (we need the Attached storage value) can be found here.
For this post I will be using the Trial, demo, or 10 light users requirements.

And finally, we can start our VM.
Thanks for reading my guide!